Fix PCs Controls Guide
Workbench parts, tools, panels, inventory, and comfort tips that keep repairs clean.
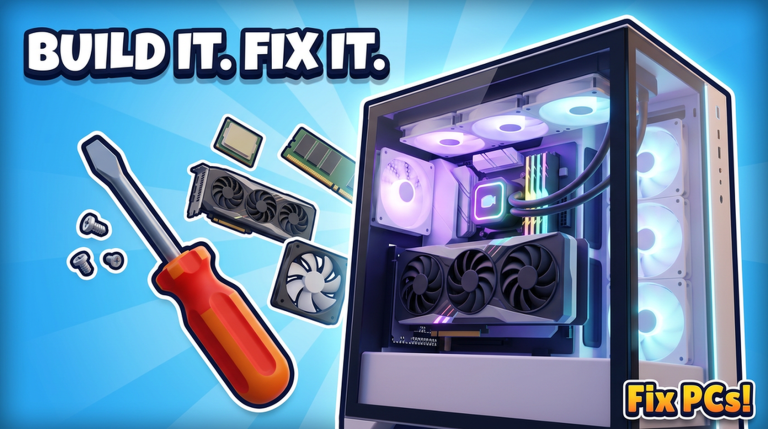
Fix PCs is a precision-toy shop sim: most of your money comes from accurate workbench interactions—clicking and dragging parts, driving screws, seating RAM, plugging cables, and confirming UI prompts—not from combat reflexes. This controls guide explains what to expect on PC and mobile, how to think about tools and panels, how inventory and orders fit the loop, and how to reduce frustration with accessibility-minded habits. Pair it with Getting Started for the first session and How to Repair PCs for fault order.
Exact keybinds can vary with Roblox device settings and game updates, so treat the sections below as interaction expectations rather than a frozen key list. Always check the in-experience prompt text when it appears.
Core movement and camera
On PC, expect standard Roblox movement (WASD), mouse look, and jump to navigate the unit, street-facing door, and multi-floor layouts once you expand in Hire Staff & Expand. On mobile, use the virtual joystick and camera drag; pinch or the game’s camera controls to frame the bench so screw heads are not hidden behind the case lip.
Shop tip: park the camera slightly above and offset from the open case. Top-down extreme angles hide slot locks; too-shallow angles make cable ports hard to tap.
Workbench interactions (the money controls)
Most repairs and builds use a shared grammar:
- Select / highlight a part, screw, cable, or tool target.
- Click or tap-drag to remove, insert, seat, or route.
- Hold when the UI asks for sustained actions (driving screws, dragging a dust pass, sliding a GPU).
- Confirm snaps—RAM latches, GPU brace screws, cooler mounts—before you assume success.
- Release cleanly; do not fling parts across the bench.
Parts
- Grab modules from the case or from a parts tray/inventory surface.
- Align to the slot until the game accepts the seat; forced angles usually mean wrong orientation.
- For dual-GPU and rack work described in Build Custom PCs, leave extra camera room so the second card’s power plugs stay tappable.
Tools and screws
- Switch to the screwdriver or highlighted tool when prompts call for it.
- Drive screws until the prompt completes—half-driven panel screws cause “why won’t it close” moments later.
- Put tools away mentally between phases so you do not try to cable-drag with the screw tool still conceptually “active.”
Dust, paste, pins, paint
Special services still use the same click-drag language:
- Dust blow-outs follow a sweep path across filthy areas.
- Thermal paste applies on the CPU heat spreader before cooler mount.
- Bent pin fixes need slow, precise nudges—zoom in on mobile if pins are tiny.
- Repaint flows follow the game’s coat/target prompts; finish cosmetics before you call the ticket done.
Power-on and benchmark controls
After closure, use the bench/power interaction the UI highlights, then start the benchmark from the prompted control. Do not spam the power action if the case is still open or a cable floats free—fix the miss with the repair checklist instead of mashing.
UI panels you will live inside
Expect several overlapping panel types:
- Job / customer info — Symptoms and requirements; read before opening the case.
- Workbench / objectives — Live checklist of remaining faults or install steps.
- Inventory — Parts you carry or store for the current job.
- Orders / catalog — Buy replacements across the 192-part fantasy catalog.
- Shop / staff / floors / décor — Expansion systems for later sessions.
- Codes / rewards — Redeem gifts; keep the Codes wiki page nearby for active lists.
Panel discipline: close or minimize overlays that block the screw you need. On mobile, rotate into portrait or landscape if one orientation eats half the bench with UI chrome.
Inventory and orders workflow
A clean control loop for stock:
- Read the job needs.
- Check inventory for a matching part.
- If missing, open orders, purchase, and wait for delivery.
- Unpack (physical interaction—walk to the delivery, open, store).
- Return to bench and resume the drag-seat flow.
Do not leave the orders UI open covering the case while you try to seat RAM. Toggle panels deliberately. When building customs or racks, stage parts in inventory order (CPU → cooler → RAM → GPU → cables) so your hands never search mid-mount.
PC vs mobile expectations
PC strengths: Precise cursor for pins, screws, and dual-GPU power plugs; easier multi-panel multitasking with mouse.
Mobile strengths: Play anywhere; large finger targets on big case parts.
Mobile watch-outs: Fat-finger misses on bent pins and tiny screws—zoom, stabilize the device, and take an extra second. Disable aggressive gesture conflicts if your phone’s system swipe steals the dust-drag.
PC watch-outs: Fast camera flicks that lose the open side panel; slow down when aligning liquid cooler tubes or rack density.
Accessibility and comfort tips
- Lower graphics if frame drops make drag actions stutter on crowded floors.
- Increase UI scale (Roblox or device settings) when text prompts are hard to read during weather-dark atmosphere moments.
- Sit closer / zoom for pin work; do not pride-check tiny targets.
- Take micro-breaks between contracts—precision games punish exhausted hands.
- Remap when Roblox allows if a default key fights your muscle memory; keep a consistent personal layout across sessions.
- Audio cues — If the game offers confirm sounds for seating, leave them on; they catch soft misses your eyes skip.
- Color / contrast — Brighten the room or client gamma if case interiors crush to black and hide cables.
- One job focus — Mute chat popups during pin straighten if social overlays steal taps.
Common control mistakes
- Dragging a GPU out before removing brace screws.
- Seating RAM at an angle and assuming “green highlight = done.”
- Leaving a panel UI open over the power button.
- Ordering parts without clearing inventory space, then wondering where the delivery went.
- Rushing dual-GPU second-card plugs without repositioning the camera.
- Ignoring mobile zoom on bent pins and breaking the straighten minigame tempo.
Practice drills (five minutes)
- Open and close a case twice focusing only on complete screw drives.
- Remove and reseat one RAM stick until the latch animation is unmistakable.
- Unplug and replug a GPU power cable slowly.
- Run a dust pass with deliberate sweeps.
- Power on only after a mental pass of the repair checklist.
These drills transfer directly into faster custom builds and cleaner contract QC when staff and floors increase volume.
Where controls meet the rest of the wiki
- First hour routing — Getting Started
- Fault order — How to Repair PCs
- Assembly density — Build Custom PCs
- Multi-floor camera paths — Hire Staff & Expand
- Part priorities — Tier List
- Freebies — Codes
Master slow, readable inputs. In Fix PCs, the best “tech skill” is a steady drag that seats the part on the first try.
Frequently Asked Questions
Quick answers to the most common questions.
How do I interact with parts on the Fix PCs workbench?
Highlight the target, then click or tap-drag to remove or install. Confirm screws, latches, and power plugs fully seat before moving to the next step.
Are controls different on mobile?
The same repair grammar applies, but use zoom and careful camera angles for pins, screws, and dual-GPU plugs. Watch for system gestures stealing drag actions.
What UI panels should I watch during a job?
Job symptoms, workbench objectives, inventory, and orders. Close overlays that block the case, and unpack deliveries before they clutter your workflow.
Why can’t I power on or finish the benchmark?
The case may still be open, a screw incomplete, or a cable unplugged. Run a quick checklist pass instead of spamming the power control.
Any accessibility tips for precise tasks?
Zoom for pins, raise UI scale for prompts, lower graphics if drag stutter appears, and enable audio confirmations if available for seating feedback.
Where should I go after learning controls?
Return to Getting Started for session flow, then How to Repair for fault depth, and Build Custom PCs when you are ready for dual-GPU and rack assemblies.