Fix PCs PC Repair Checklist
A bench-side diagnose list for Fix PCs tickets — cheap fixes first, silicon second, benchmark always.
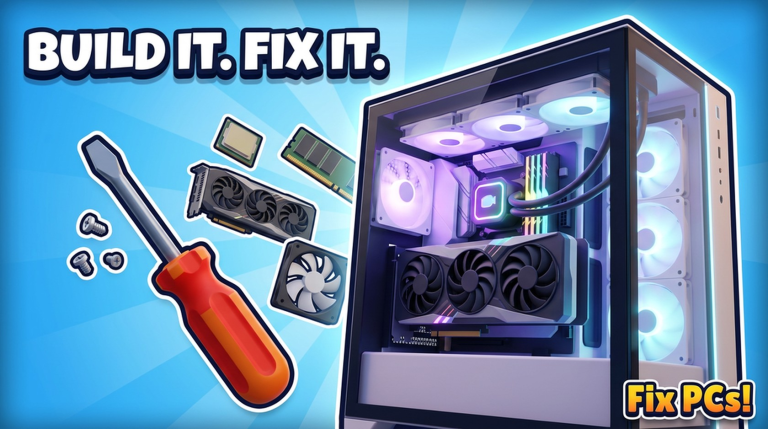
Use this Repair Checklist on every walk-in in Fix PCs! before you burn cash on a top-shelf GPU. The list mirrors the real loop — customers bring broken PCs → diagnose → workbench → parts/screws/cables → power on → benchmark → get paid — and prioritizes dust, viruses, fans, pins, and cables ahead of speculative silicon swaps.
Keep this page open beside the game. Teaching context lives in How to Repair and Getting Started. Parts priority sits on the Tier List Hub. Return to the Tools Hub for more utilities.
How to run the checklist
Work top to bottom. Only skip a section when the symptom chart says it cannot apply (for example, skip GPU tests when the ticket is clearly a paint-only cosmetic contract). Check boxes mentally or copy the list into your notes.
0) Ticket intake
- Read the customer complaint / ticket text fully
- Note whether this is a walk-in repair, custom build, dual-GPU / workstation, or server rack job
- Confirm you have bench space on this 6-player server (see Players etiquette)
- Glance at cash and Job Bin stock before promising same-minute miracles
If it is a from-scratch custom, jump to the Custom / contract addendum after section 1 symptoms, then follow assembly order from Build Custom PCs.
1) Symptom triage (do not buy parts yet)
- No power / no lights → start at Power & cables
- Powers on, no display → Cables / GPU seating / RAM before new GPU
- Random shutdowns / thermal warnings → Dust & cooling
- Boot loops / memory errors → RAM & motherboard basics
- Pop-ups / weird behavior with otherwise fine hardware → Virus clean
- Physical damage to socket → CPU pins
- Cosmetic only → Case / paint path (still verify it turns on)
Write the suspected tier of fix: Service (dust/virus/cables) vs Part (RAM/CPU/GPU/board) vs Chassis (case/cooler fit).
2) External & quick service checks
- Inspect case for missing panels that block airflow or access
- Check obvious loose external cables / power lead presentation
- Run dust blowout on intakes, filters, and heatsinks
- Verify case fans spin; replace dead fans before condemning the CPU
- Listen/look for liquid cooler pump activity if an AIO is installed
- Run virus cleaning when software symptoms match
- Document anything you already fixed — customers still need a full pass
Dust and fans are S-tier early-shop profit. Details on Cooling & Cases.
3) Open the chassis on the workbench
- Move the PC to the workbench correctly
- Remove access panels without yeeting screws into the void
- Photograph-with-your-eyes the cable routing before you unplug a forest of wires
- Confirm you still remember which header was the CPU fan / pump
Rushing this step is how “simple RAM swaps” become “why won’t it post” mysteries.
4) Power, screws, and cable discipline
- Reseat main board power and CPU power connectors
- Reseat GPU power plugs (all required connectors)
- Check front-panel / switch cabling if the machine never wakes
- Confirm storage and accessory cables are not half-clicked
- Install all required screws for GPU bracket, cooler, and board standoffs you touched
- Replace panels that matter for airflow before the thermal test
Fix PCs makes screws and cables first-class failure points. A perfect GPU with one missing power lead fails the benchmark every time.
5) RAM checks
- Reseat existing sticks fully
- Test with one known-good stick if posts are flaky
- Replace confirmed bad DIMMs from Job Bin stock
- For builds, install matched kits — see RAM grades on GPU & CPU tiers
- Avoid mixing random capacities when the board is picky
RAM is the early-game hero. Stock it like consumables.
6) CPU & cooler checks
- Inspect for bent CPU pins; straighten carefully before buying a new CPU
- Confirm cooler mount pressure is even — not diagonal crush
- Reseat cooler power
- Replace thermal interface / cooler when shutdowns persist after dust service
- Only swap the CPU when pins/board/power checks already passed
Bent-pin saves are skill expression. Do not skip them.
7) GPU checks
- Confirm the slot click / bracket screws
- Confirm every required power cable
- Rule out display cable / output mistakes when the shop setup allows
- Swap GPU only after power and seating checks
- For dual-GPU contracts, verify board support and clearance before installing the second card
High-end GPUs are mid/late shop tools. Early tickets rarely need trophy cards.
8) Motherboard last (among silicon)
- Treat board swaps as long jobs — schedule them when the queue allows
- Match CPU socket and RAM generation
- Transfer coolers/GPUs carefully; re-run pin and cable sections after
- Keep one common spare board in mid shop so multi-ticket days do not stall
9) Case, paint, and display work
- If the chassis is damaged, replace with a tool-friendly tower
- For repaint contracts: complete functional repair first
- Paint / glass / RGB only after a successful thermal direction check
- Ensure new panels did not smother intakes
- Shopfront display PCs still need a passed benchmark — pretty bricks teach the wrong lesson
10) Power on & benchmark (non-negotiable)
- Power on the machine
- Confirm POST / desktop equivalent behavior in-game
- Run the benchmark fully — do not deliver on “it lit up once”
- Watch for thermal flags during the test
- Collect payment only after success
- Return leftover parts to labeled shelves
Unpaid “almost fixed” PCs are unfinished tickets.
Custom / contract addendum
Use after intake when the job is a build order:
- Read the contract specs (GPU count, RAM floor, case style, rack vs desktop)
- Confirm motherboard supports the plan (GPU & CPU)
- Confirm cooler / GPU length fit the case (Cooling & Cases)
- Stage parts on the bench before unscrewing anything
- Assemble: board → CPU → cooler → RAM → GPU(s) → cables → screws → panels
- Run section 10 benchmark under expected load
- Apply paint/aesthetics after function passes
Patch-day mini checklist
After notes on the Updates Hub:
- Rejoin Fix PCs
- Complete one dust job via sections 2–4 and 10
- Complete one RAM job via sections 5 and 10
- Confirm order/unpack flow still works
- Check Codes only if the patch mentions gifts
- Then accept complex dual-GPU or rack work
Common failure patterns this list prevents
- Buying a GPU for a dust problem — section 2 first.
- Missing a power cable — section 4.
- Ignoring bent pins — section 6.
- Skipping benchmark — section 10.
- Painting a thermally dead showpiece — section 9 order.
- Starting dual-GPU without board support — contract addendum.
Related pages
- Tools Hub — parent utilities index
- How to Repair — full narrative guide
- Getting Started — first-session setup
- Build Custom PCs — customs and racks
- Tier List / GPU & CPU / Cooling & Cases
- Scripts — why this checklist beats autofarm fantasy
Print it in your brain. Pass the benchmark. Get paid.
Frequently Asked Questions
Quick answers to the most common questions.
Do I need to follow every checkbox on every ticket?
Follow the order, but skip sections the symptom triage rules out. Never skip power-on and benchmark when the PC is supposed to run.
What is the most common beginner mistake?
Buying expensive GPUs before dust, fans, cables, RAM, and pin checks. Service fixes clear many early jobs cheaper and faster.
Where does virus cleaning fit?
In quick service checks when behavior looks software-broken despite healthy hardware. Clean before replacing silicon on those tickets.
Can I use this checklist for dual-GPU contracts?
Yes. Use the custom/contract addendum for compatibility, then the same cable, screw, and benchmark finish.
Is this an automated in-game tool?
No. It is a player-facing markdown checklist on the wiki. You still perform each step inside Fix PCs.
What should I read after mastering the list?
How to Repair for deeper diagnosis stories, then the Tier List pages so your Job Bin matches the faults you see most.